HARDNESS TEST
Hardness is the property of a material that enables it to resist plastic deformation, usually by penetration. However, the term hardness may also refer to resistance to bending, scratching, abrasion or cutting.
Hardness is the property of a material that enables it to resist plastic deformation, usually by penetration. However, the term hardness may also refer to resistance to bending, scratching, abrasion or cutting.
Measurement of Hardness:
Hardness is not an intrinsic material property dictated by precise definitions in terms of fundamental units of mass, length and time. A hardness property value is the result of a defined measurement procedure.
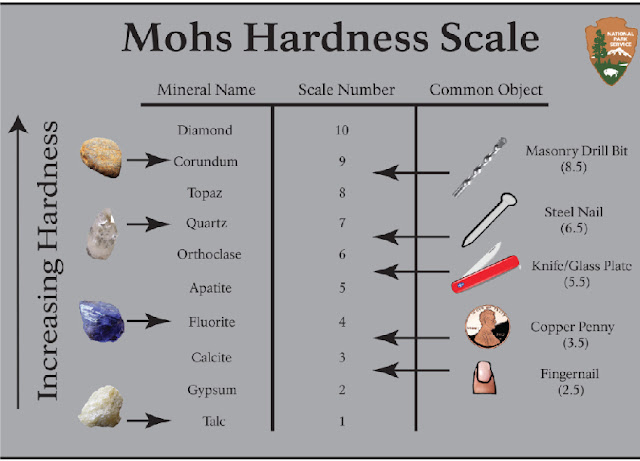
Hardness of materials has probably long been assessed by resistance to scratching or cutting. An example would be material B scratches material C, but not material A. Alternatively, material A scratches material B slightly and scratches material C heavily. Relative hardness of minerals can be assessed by reference to the Mohs Scale that ranks the ability of materials to resist scratching by another material. Similar methods of relative hardness assessment are still commonly used today. An example is the file test where a file tempered to a desired hardness is rubbed on the test material surface. If the file slides without biting or marking the surface, the test material would be considered harder than the file. If the file bites or marks the surface, the test material would be considered softer than the file.
The above relative hardness tests are limited in practical use and do not provide accurate numeric data or scales particularly for modem day metals and materials. The usual method to achieve a hardness value is to measure the depth or area of an indentation left by an indenter of a specific shape, with a specific force applied for a specific time. There are three principal standard test methods for expressing the relationship between hardness and the size of the impression, these being Brinell, Vickers, and Rockwell. For practical and calibration reasons, each of these methods is divided into a range of scales, defined by a combination of applied load and indenter geometry.
Hardness Testing Methods:
- Rockwell Hardness Test
- Brinell Hardness Test
- Vickers Hardness Test
